Running the board: Difference between revisions
(→Setup) |
No edit summary |
||
| Line 6: | Line 6: | ||
<html> | <html> | ||
<form name="setup"> | <form name="setup"> | ||
<p><input type="checkbox" name="myboxes"></html>Make a little sign for the monitor for starting outro: '''16:55:31'''.<html></p> | <p><input type="checkbox" name="myboxes"></html>Make a little sign for the monitor for starting outro music: '''16:55:31'''.<html></p> | ||
<p><input type="checkbox" name="myboxes"></html>Ask staff to start Facebook thread.<html></p> | <p><input type="checkbox" name="myboxes"></html>Ask staff to start Facebook thread.<html></p> | ||
<p><input type="checkbox" name="myboxes"></html>Get a bottle of water.<html></p> | <p><input type="checkbox" name="myboxes"></html>Get a bottle of water.<html></p> | ||
Revision as of 15:51, 23 March 2013
Checklists
Setup
During the Show
Make sure that the staff starts the show thread on Facebook before 4:00 PM!
- How to set microphone levels
- How to start the show
- How to play interludes:
- How to take a call
- Use slider to mute caller
- Use the "Off" button to hang up
- How to end the show
Shutdown
Tutorial
Basic Theory
Pgm, Aud, Tel
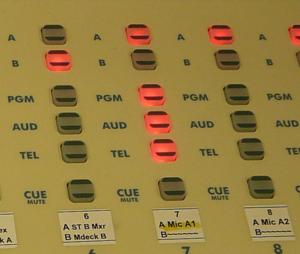
The board is a mixer. You may imagine sound playing into the different channels on the board; the decisions you make on the board decide which channels are on, how loudly they play, and where the sound goes next.
The "On" and "Off" buttons at the bottom of each channel decide whether that sound comes into the mixer.
The little buttons above the volume sliders decide where the sound on that line will go.
- PGM: output goes to the Program Computer to be broadcast live.
- Aud: output goes to Adobe Audition recorder.
- Tel: output goes to the telephone lines.
Going Live
The master computer directs all output from the board to the air, starting around 16:00:01, and takes the output from the board off the air around 16:56:31.
Either it works or it doesn't.
Getting the show on the air is not the lowly moderator's problem.
How to Set Up for the Show
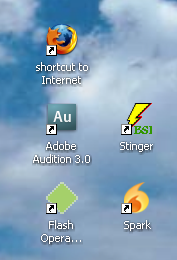
Start Spark Chat

- Double-click the Spark icon.
- Double-click conference chat.
- Fuss with name to personalize it and get the desired color scheme. “Daughter of Zion†apparently is not a good color. “father†is hot pink.
- Resize and relocate the chat window to taste.
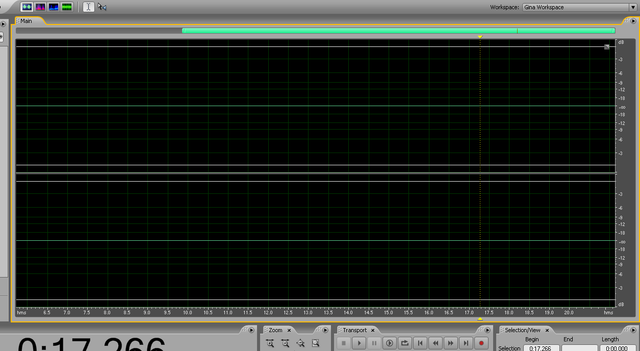
Start Adobe Audition

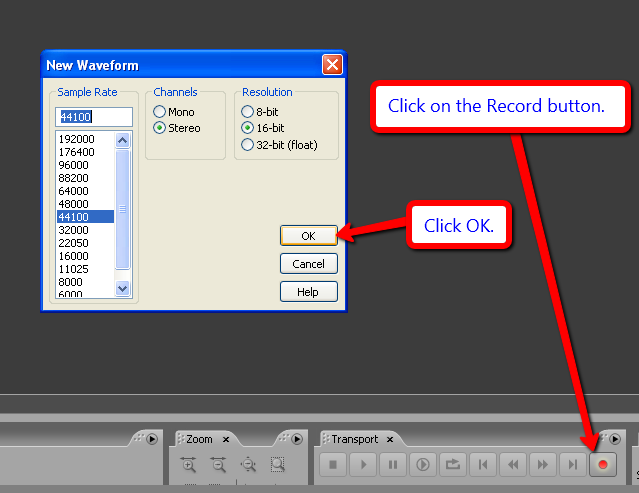
- Double-click on icon.
- Click record button.
- A small window will pop up asking confirmation of the default bit rate. Click OK.
- May start this early. The material recorded before the program begins can be trimmed.
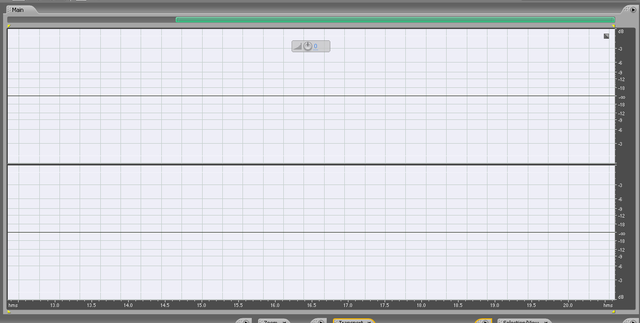
- Make sure that the recording track is not highlighted.
- Black = not highlighted; white = highlighted.
- If it is highlighted, it will stop recording at the end of the highlighted block.
- To unhighlight the track, click on it once.
- Sanity check: Start recording, minimize the window or drag another window over it, and make sure that the recording continues. Be careful not to highlight the track while doing the sanity check!
- How to inadvertently highlight the recording track (bad dog!)
- Start recording.
- Press the stop button.
- The material that you have recorded to this point will be highlighted.
- If you now press record again, the program will record over the highlighted portion of the track, then stop at the end of the highlight.
- To clear the track (turn it black), click on the track once. Now when you press the record button, the recording will continue through the rest of the show.
Start Flash Operator

- Double-click icon.
- Re-size and position windows as needed.
- Goal: get Spark and Operator arranged to your taste.
Plug Headphone into Board
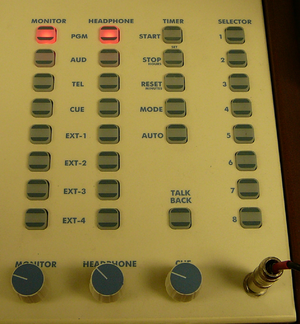
- There is only one jack over in the lower righthand corner of the board.
- Turn Headphone on (Monitor is optional).
- Control volume with Headphone knob.
Studio A
Studio A: Microphone

Line 7: Microphone A1
- Highlight all 3 buttons at top (Pgm, Aud, Tel).
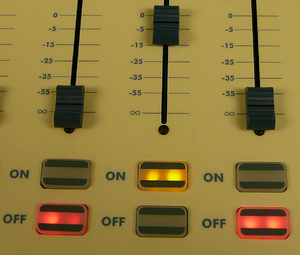
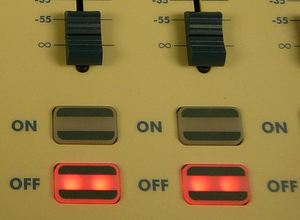
- Push “On†to use the mic, “Off†to clear throat.
Studio A: CD Player
Set Channels on the Board
CD1 & 2
- Line #14 = CD1 = Intro / Outro CD.
- Line #15 = CD2 = Interlude CD.
- Turn on three buttons above slider: Pgm, Aud, Tel.
- Turn line “On.â€
- Put Intro/Outro CD into CD player #1.
- Put Interlude CD into CD player #2.
- Bring sliders up to audible level.
- It only takes a minute to test that you have the right configuration. The Interlude plays for twenty seconds. Make sure that it plays only once and then stops. The next time you press play, it should play again once and stop.
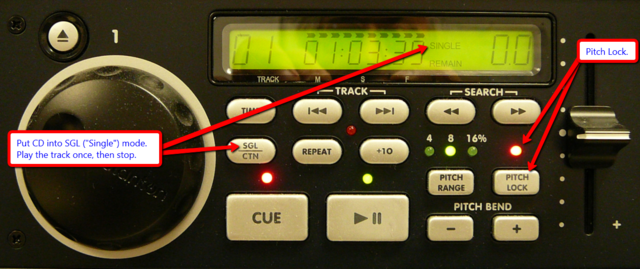
Studio A: Configure CD player
- Power on.
- Put each player into "play one track and stop" mode.
- Put Pitch Lock on.
- Intro/outro music CD in player #1.
- Interlude in player #2.
Studio A: Telephone Lines
back to the telephone!

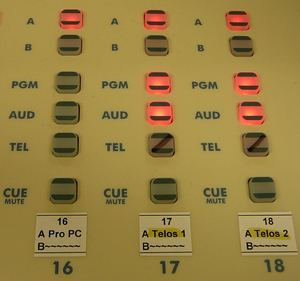
- Channel 17 = A1
- Channel 18 = A2
- Turn on Pgm and Aud but not Tel (!). Sending the telephone output back to the person on the telephone will create a wicked feedback loop. The Tel button has a black line drawn through it with magic marker to remind you of this essential step.
- Leave both lines off. This is like leaving a handset on a telephone. When the phone lines are "off," i.e., not in use, they are ready to receive a call. When the time comes, turning the line "on" will be exactly the same thing as picking up a telephone to answer it.
Studio B
Studio B: Microphone
- The moderator's microphone is channel 1 on the board.
- The guest's microphone is channel ?????.
- Highlight all 3 buttons at top (Pgm, Aud, Tel) to send the output of the channel to the air, to the recorder, and to the telephone.
- Use "Off" button to cough or clear throat.


Studio B: Telephone Lines
- Channel 11 = B1 = Extension #132
- Channel 12 = B2 = Extension #133
- Turn on Pgm and Aud but not Tel (!). Sending the telephone output back to the person on the telephone will create a wicked feedback loop. The Tel button has a black line drawn through it with magic marker to remind you of this essential step.
- Leave both lines off. This is like leaving a handset on a telephone. When the phone lines are "off," i.e., not in use, they are ready to receive a call. When the time comes, turning the line "on" will be exactly the same thing as picking up a telephone to answer it.


back to the telephone!
Studio B: Stinger

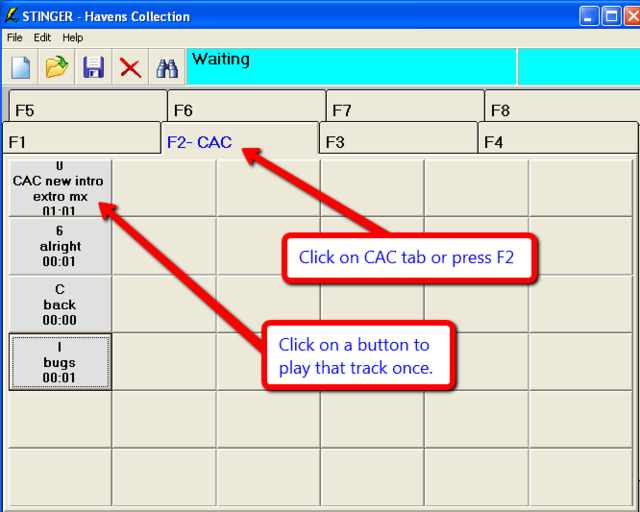
- Double-click the Stinger icon.
- Click on CAC tab or press F2.
- Click on a button to play the desired track once.
- To add a track to Stinger, press CTRL-F, find the track, then drag it to an empty button.
- To remove a track, right-click on the button and select the remove or delete item from the menu.
- To save your configuration, use "File / Save set".
Studio B: CD Player
This is a tricky beast!
It is a Marantz PMD321 Professional Compact Disc Player.
It has to be programmed to play one track and stop. Otherwise, it just acts like a CD player and plays one track after another without stopping. Well, DOH! That's what CD players do, isn't it?
- In normal mode, you can press the Pause Button to stop playing at the end of one track, then press the Pause Button again to resume playing for the next track.
- To select which track to play next, press the button associated with the desired track.
How to set microphone levels
The red LED on the sound meter reports peak sound levels faster than the needle.
It's good to see LED peaks on a regular basis, but not lit all the time. Momentary peaks mean that the sound is full.
Red-lining the needle and the LED is bad. Back off from the microphone or lower the level.
How to start the show
- Press play button on CD player at 16:00:01.
- Wait for the right chord, then fade music and do intro over it. Keep talking and the music will quit after a minute.
How to play Interlude
Studio A: Interlude
- Interlude CD should be in player 2
- The three output buttons for player 2 (Pgm, Aud, Tel) should be on.
- The input line for player 2 should be on
- Press play button for CD player 2
Studio B: Interlude
How to take a call
- Make sure that the channel you want to use (A1, A2, B1, B2) is "Off." You can't answer a telephone call when the receiver is off the telephone; you can't answer a transferred call unless the line is "Off" when the call is transferred.
- Drag tiny people icon from lines 60-63 to the tiny telephone icon on the A1 or A2 connection with the mouse. It is really important that you drop the tiny people icon on the tiny telephone icon. If you fail this test of hand-eye coordination, the call is dropped!
- Nothing will happen until you release the mouse button while the little people are hovering over the tiny telephone. The purpose of this feature is so that the little people can be dragged over lots of irrelevant tiny telephones en route to the line to which you wish to route the call. "Let my people go!"
- Release the mouse button with your right hand and depress "On" button with your left hand. There is no rush. The caller will hear the phone ringing as the transfer is made. You have at least a minute to "answer the call" by pressing the "On" button.
- Bring up caller's slider while saying "Hello, _____, you are on the air ...", and then adjust the slider volume as needed when they start speaking.
- Remember the name of the person transferred to A1 or A2. There is no cue available after the call is transferred.

Use slider to mute caller
- To keep the caller on the line but to silence them, bring the slider down to zero.
Use the "Off" button to hang up
- The "Off" button drops the line.
- Reset level on slider to average.
CAC e-mail setup
Studio B Headphone Switch
How to end the show
- Lower slider on Line #4 – CD 1.
- Start outro music playing on CD player at 16:55:31.
- Bring up music gradually to audible-but-notoverpowering level.
- Do outro. Stop talking before 16:56:31.
- Bring music slider up to normal level and let the music finish. Goal: hit last chord before the Program computer switches to next output.
Save the recording
- Stop the recording in Adobe Audition.
- In Adobe, select "File / Save As".
- Browse to My Computer → (Z:) → Production → CAC → {this month-this year}
- Left-click once if there is a file in the folder already, then edit the date. Otherwise, name file like this: CAC-MMDDYY.mp3.
- So, for example, the November 8, 2010, show ends up with this filename:
- Z:\Production\CAC\November-2010\CAC-110810.mp3
- So, for example, the November 8, 2010, show ends up with this filename:
- Click Save.
Shut down
- Turn off all lines and all buttons on the board.
- Exit Spark, Flash Operator, and Adobe Audition.
- Restore original Sparc font size (if I've fiddled with it).
- Turn off the computer monitor.
- Close the door to Studio B--keep it cool.
- Studio A
- Open the door to the computer room to improve circulation. Close the door to the corridor after exiting the studio.
- Turn off the CD player on Friday afternoon in Studio A.
Say goodnight, Gracie.
Learning from mistakes
Transferring calls
- LEFT-click on little people to drag them over to the tiny telephone.
- Trying to drag the red light does no good.
- Nothing happens with the tiny telephone until the little people are let go on top of it. This allows the mouse to travel over other tiny telephones without disturbing them beforehand. Letting go is what actually drops the people on the phone.
- Test the feel of the big On/Off buttons. I think I only half-pressed them a couple of times.
- If I drag the little people to the line I am currently using to talk to someone, that produces "call waiting sounds." That's no good!
- I've made this mistake twice. I did it again on 17 August when trying to move a call to Line 1 after hanging up that line and before bringing up the volume on line 2. I put Bob's call over Nick's call. Fortunately, Nick had a good sense of humor and kept calling until we were able to talk at last.
Other items
- Show opening: position one hand or the other on the correct slider for lowering the level of the music!
- 17 August: I forgot to pray at the beginning of the show! Jumped right into the rosary question.
- CD line on if I'm going to play a CD (DOH!).
- The key to using the CD player in Studio B is to use the Pause Button to stop and start the playback. If I use the Pause Button to pause a CD, the only way to start it up again is to press the Pause Button. The Play Button is taken out of play. I don't know what Cue does.
- Work on intro and outro before the show. Have a plan in place!
- "Good afternoon and thanks for listening to 'Calling All Catholics. I'm Fr. _____________ ... This is [Faith and Reason Friday ...]" Give phone number, e-mail, and Facebook information, as usual.
- "Thanks for listening to 'Calling All Catholics.' A podcast of today's show will be available by 10 AM on _____________. Fr. __________ will be here to take your calls on ________________. We hope you will have a very happy and blessed [evening / weekend]. God bless!"
- Thank callers and correspondents by name at the end of answering their question(s).
- Run slider down for outro music. Bring up slowly. No need to rush!
- Leave mic off until after I've got the recording started and the music playing! I tend to talk to myself under stress. No need to inflict my oopsies on the audience!
- Remember to e-mail chat transcript to myself as usual.
- I turned off the PC line instead of the phone line one time. Then I got a busy signal when the phone line went dead. I get tunnel vision when I'm talking and punching buttons at the same time! :o(
- Similarly, I must make sure the PC line is on and that I've got the right slider when it's time to play the outro music. I haven't made this mistake yet, but I can see that it's the kind of thing I'm likely to do under stress.

